


Description
READ FULLY BEFORE ORDERING
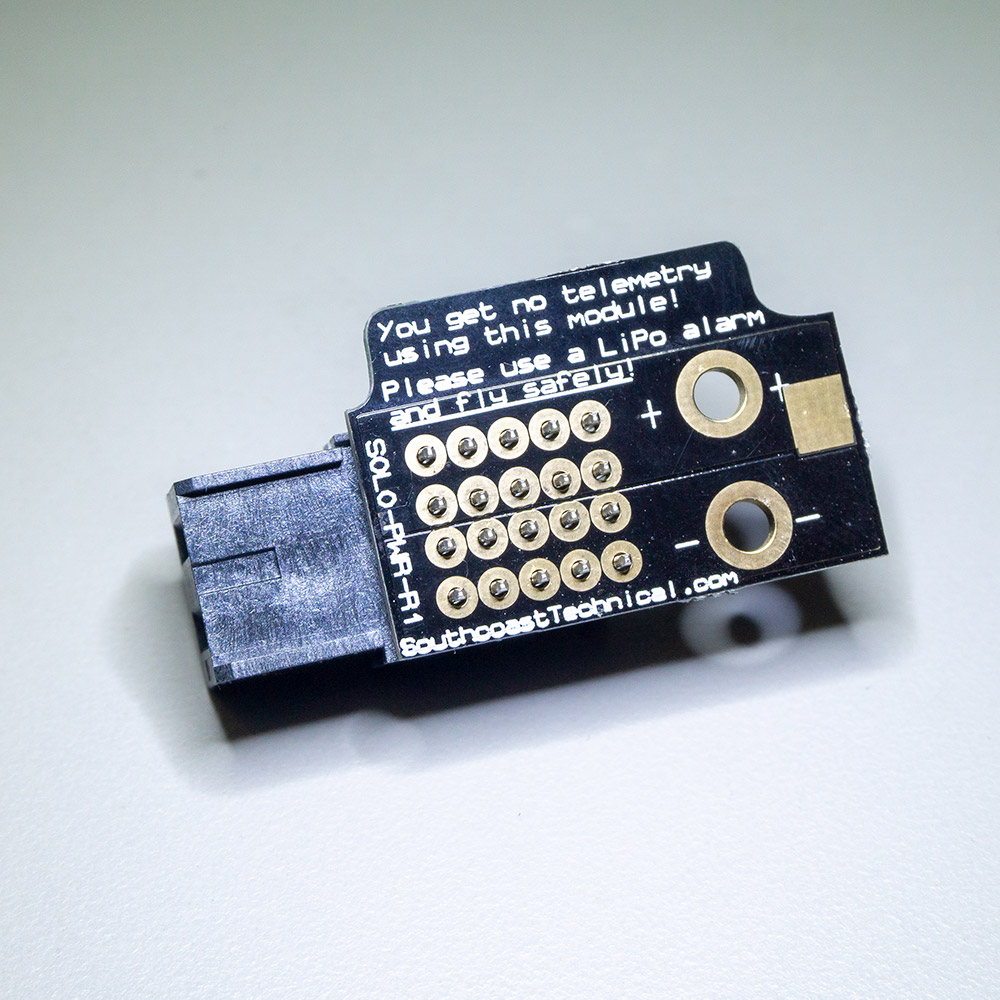
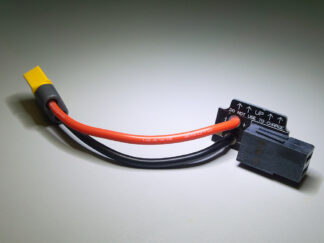
This board will mate with the power contacts on your 3DR Solo and will allow you to connect a standard LiPo battery to your drone. Please note that this adapter DOES NOT HAVE the circuitry or split-power contacts for SMBus. This means that the typical Solo battery telemetry (Voltage, Current, Percent Remaining) cannot be calculated and will show up as ‘0’ on your controller. If you intend to fly using this module, we highly recommend timing your flights and purchasing a LiPo low voltage alarm (found cheap on eBay, Amazon, or HobbyKing) to ensure your battery doesn’t die mid-flight (since the Solo doesn’t know the battery stats, it cannot initiate the ‘low battery’ fail-safe). This is common in the RC hobby where ‘smart’ batteries/telemetry do not exist.
DOES NOT WORK WITH GREEN CUBE/LATEST ARDUCOPTER:
The ‘Green Cube’ (or a stock cube with upgraded ArduCopter) with ArduCopter 3.5.4 (and most likely all other recent versions) will emit a continuous low battery warning when using this module. The only way to disable this is by changing parameters within ArduCopter. We do not recommend this, as the changed parameters mean the Solo will not attempt to get battery information (even from the smart batteries). Due to this, we do not support using this with ‘Green Cube’ (or a stock cube with upgraded ArduCopter) and will not tell you how to modify your parameters. This product description assumes you are NOT using a ‘Green Cube’ (or a stock cube with upgraded ArduCopter).
We have flown this module with the stock Solo cube & stock Solo firmware (2.4.2), and no parameter changes are required. The Solo power telemetry will all show ‘0’ when using this module, but the Solo is still able to query smart batteries when they are used. We have tested the same behavior with the stock Solo cube and OpenSolo (2.5-RC3).
Arming
Due to the lack of SMBus, the Solo will not ‘arm’ by pressing the ‘Fly’ button. You must arm it by issuing the ‘arm’ command with the left stick, bringing it all the way down and to the right, then take-off by raising the throttle:

So just to be clear:
- Stock Solo cube with stock Solo firmware (2.4.2) = No battery telemetry, but if the Solo cannot get the battery status, it doesn’t output a low voltage alarm (so you can swap from this module and a smart battery, and still get battery information [and failsafes] with the smart battery, no parameter changes necessary). You must use the left stick to arm and takeoff.
- Stock Solo cube with OpenSolo (2.5-RC3) = No battery telemetry, but if the Solo cannot get the battery status, it doesn’t output a low voltage alarm (so you can swap from this module and a smart battery, and still get battery information [and failsafes] with the smart battery, no parameter changes necessary). You must use the left stick to arm and takeoff.
- Green Cube (or a stock cube with upgraded ArduCopter) = continuous low voltage alarm since it cannot get battery status. You must change parameters to disable this (but it also disables getting battery status when using a smart battery, so we’re not going to support this)
Another use of this module is to power your drone using a bench-top power supply while you’re doing mods/other work on your drone.
NOTE that you CANNOT use the standard Solo battery charger to charge a normal LiPo using this module. The Solo smart battery has protections which allow it to be used with the charger, a normal LiPo DOES NOT. You MUST use a dedicated LiPo charger with your standard LiPos. Some examples can be found here.
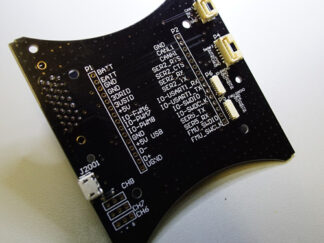
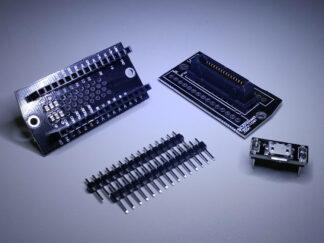
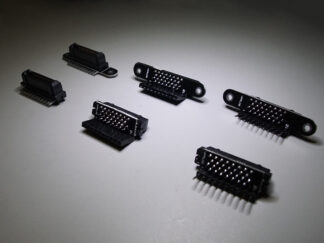
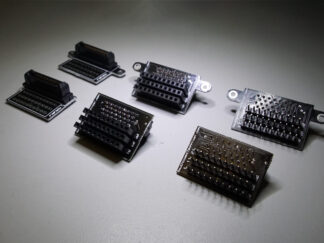
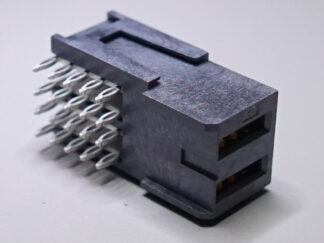
The PCB carries a genuine Molex 46436-9202 connector (which we also sell separately) and provides two holes and two pads for soldering wires for a standard connector to (XT-60, Dean’s, etc.). Do not be alarmed that the pins on the Molex connector are not soldered to the PCB. We use a press-fit version of the connector (overview of press-fit), meaning no soldering is needed (press-fitting is more reliable, consistent, and quicker than soldering).
Options
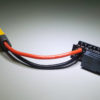
- XT-60 Connector (soldered or not) to the PCB with 10cm leads (14AWG)
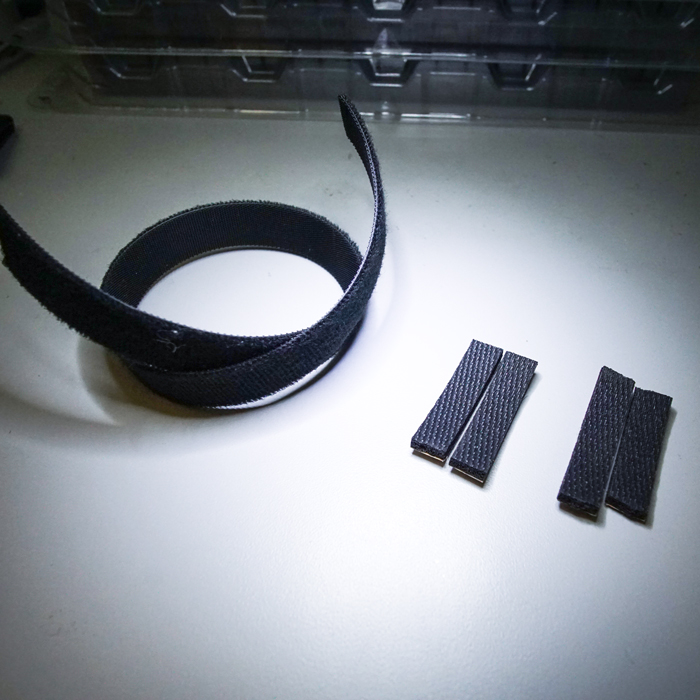
- Fastening Kit: Includes ~16″ of velcro and 4 pieces of anti-slip foam (with adhesive) so you can secure your battery in the Solo.
What battery can I use in my Solo?
Good question. While the standard Solo battery is 4S, we have flown with a 3S battery as well (not recommended, due to the higher strain on the components, but the software does compensate for the reduced RPM, even with the gimbal attached). However, a 4S is recommended because it is closer to stock, and provides a ‘snappier’ and more familiar response. Here are some batteries we recommend (you’ll notice that they have the exact same capacity as the stock Solo battery):
Tattu 4S 5200mAh 15-30C LiPo (Tattu is the manufacturer of the original Solo Battery, and this battery fits very nicely in the Solo tray):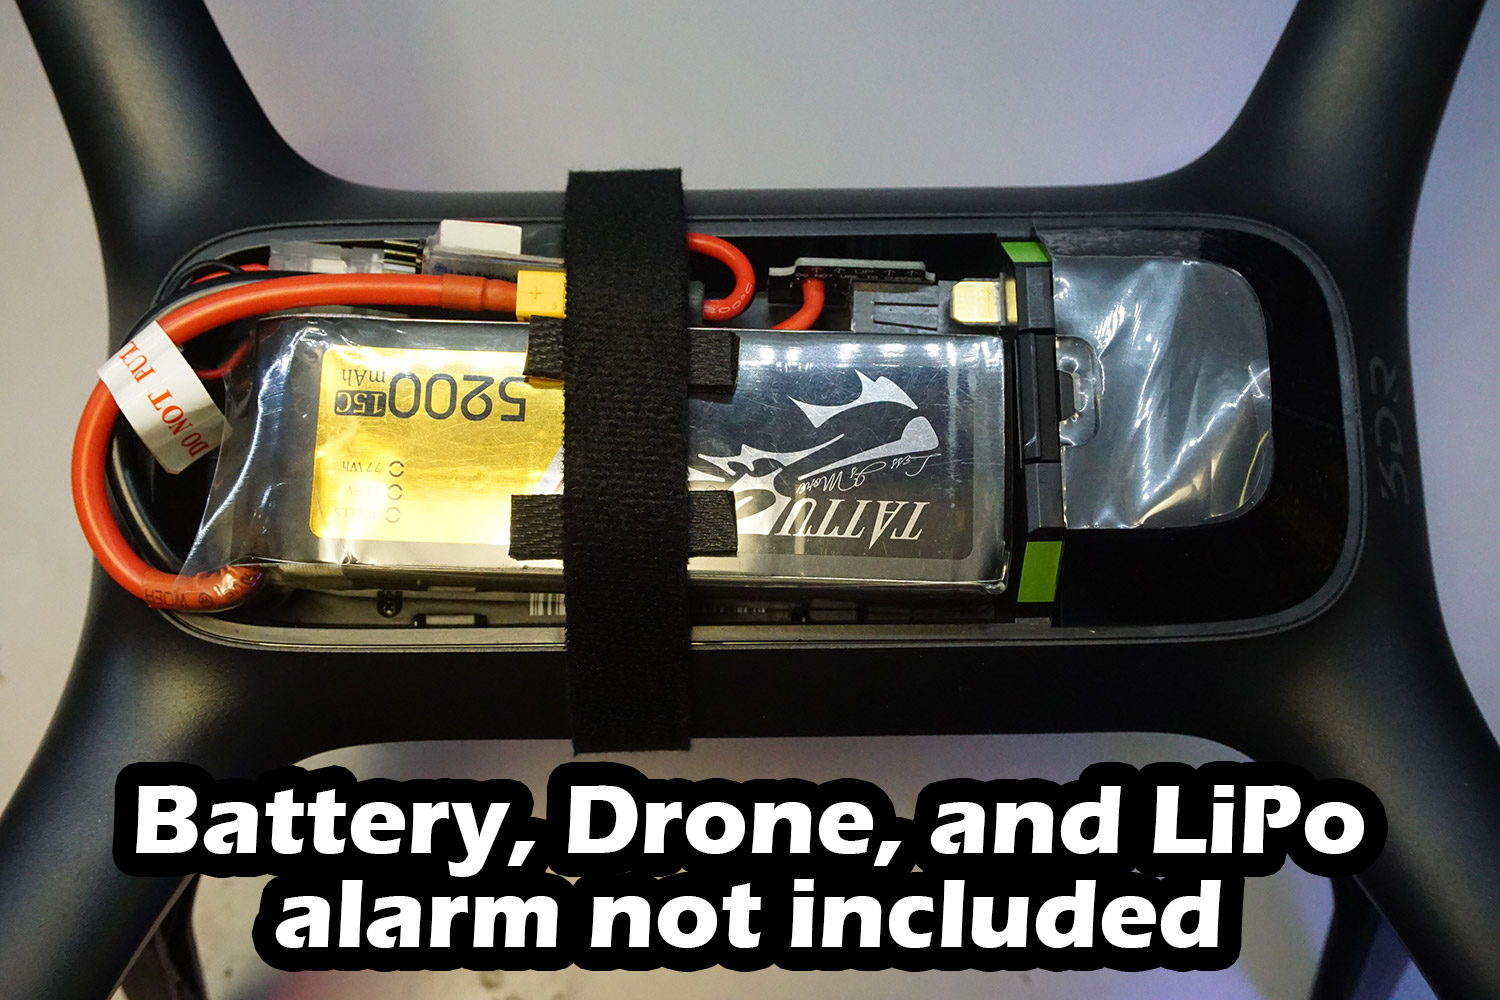
Multistar 4S 5200mAh 10C LiPo (This battery is a tighter fit in the Solo tray than the Tattu, but will still fit):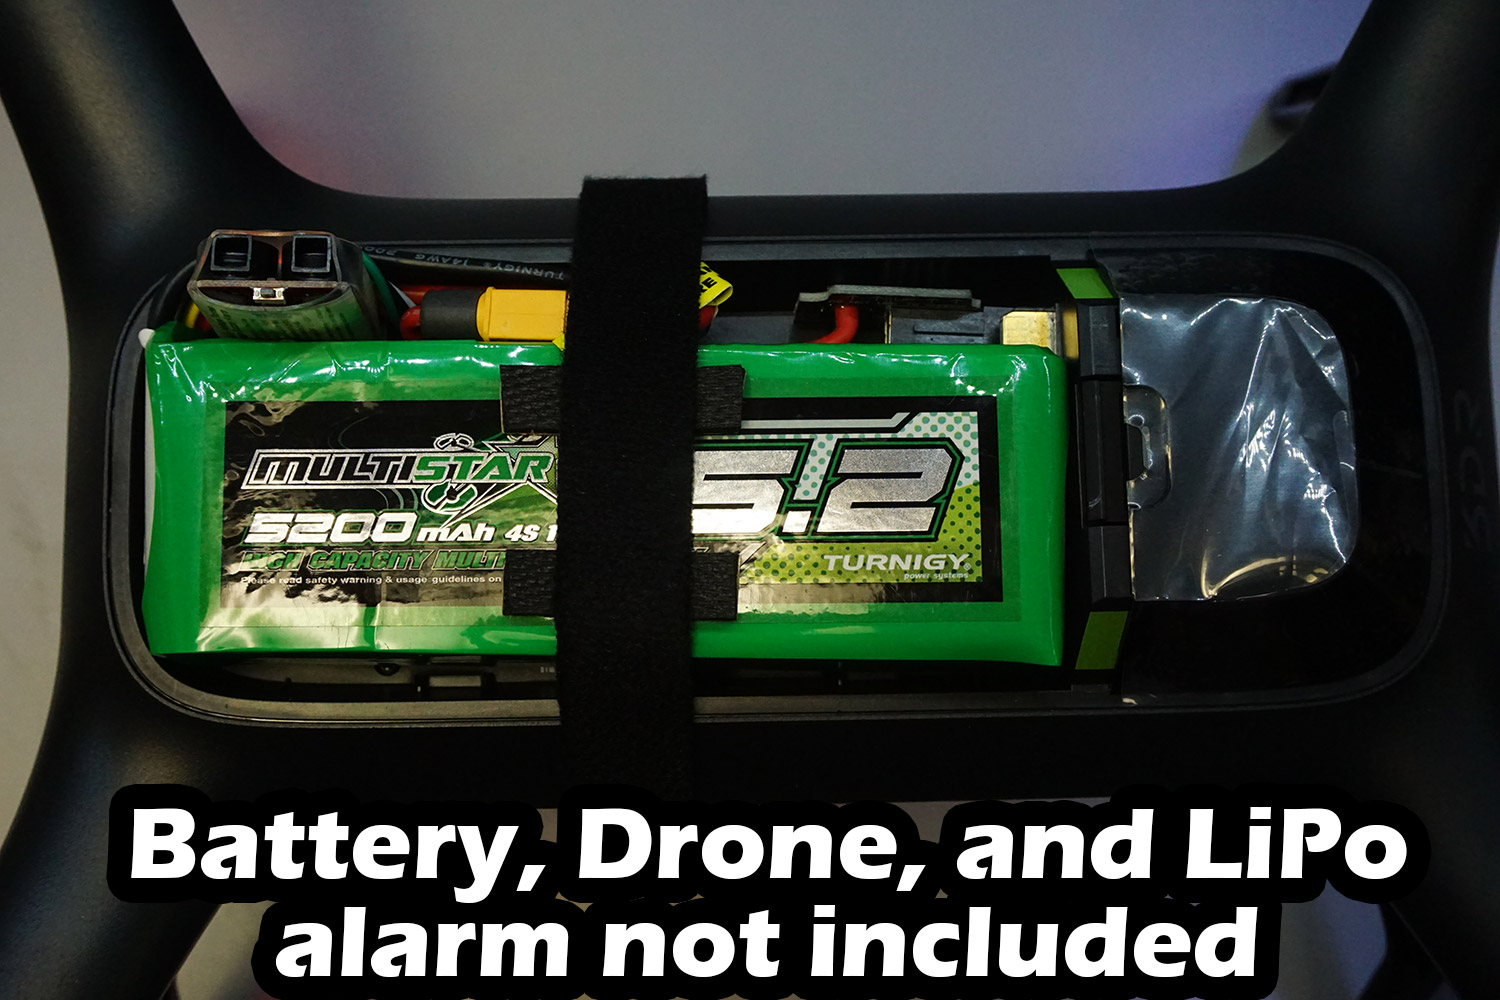
If you’re at HobbyKing buying a battery, be sure to pick up a LiPo low voltage alarm, if you don’t already have one. Otherwise, they can be found at eBay and Amazon (at the time of this post [08DEC2017], GensTattu did not have a LiPo low voltage alarm in their shop, otherwise we’d include a link to them as well). Make sure the low voltage alarm is set to an appropriate trigger level (in general 3.2V per cell is considered ‘completely empty’, and many people tend to land around 3.5V per cell, to give enough time to land once the alarm goes off. Do some research and testing to figure out a voltage level that works for you). See the manufacturer’s documentation for instructions on how to set the low voltage alarm’s threshold level.
Open Source
This PCB is open source. Information and file links can be found in our product post.
Disclaimer
It is the user’s responsibility to use this product in an appropriate manner. The pilot is always responsible for ensuring the safety of the flight. This includes steps such as checking all connections to make sure they are tight, will not come apart, shift, or interfere in the air, and using the correct battery voltage/type/C-rating/etc. for the aircraft. In no event shall our company be liable for any direct, indirect, punitive, incidental, special consequential damages, to property or life, whatsoever arising out of or connected with the use or misuse of our products.
Reviews
There are no reviews yet.